
How to set up lead qualification and automate next steps
ee your visitor-to-lead funnel, set what makes a lead qualified, and create a ticket automatically for each new qualified lead in Text.
 Izabela KubikUpdated 3 min read
Lead qualification in Text now lives on one page. The Qualification page in Settings shows your visitor-to-lead funnel for last week, lets you define what makes a lead qualified, and sets up what happens next. You no longer need to switch between customer details and Reports to see the full picture.
What is lead qualification in Text?
Lead qualification in Text is the process of deciding which leads are ready for your team. A lead counts as qualified once it has the customer details you require, such as budget or company size. The Qualification page lets you set those requirements and see how many leads meet them.
How do you read your lead funnel?
Check the three fields at the top of the page. They cover last week:
Visitors: people who landed on your website.
Leads: visitors you can contact again because they shared an email address or phone number.
Qualified leads: leads that meet your qualification requirements.
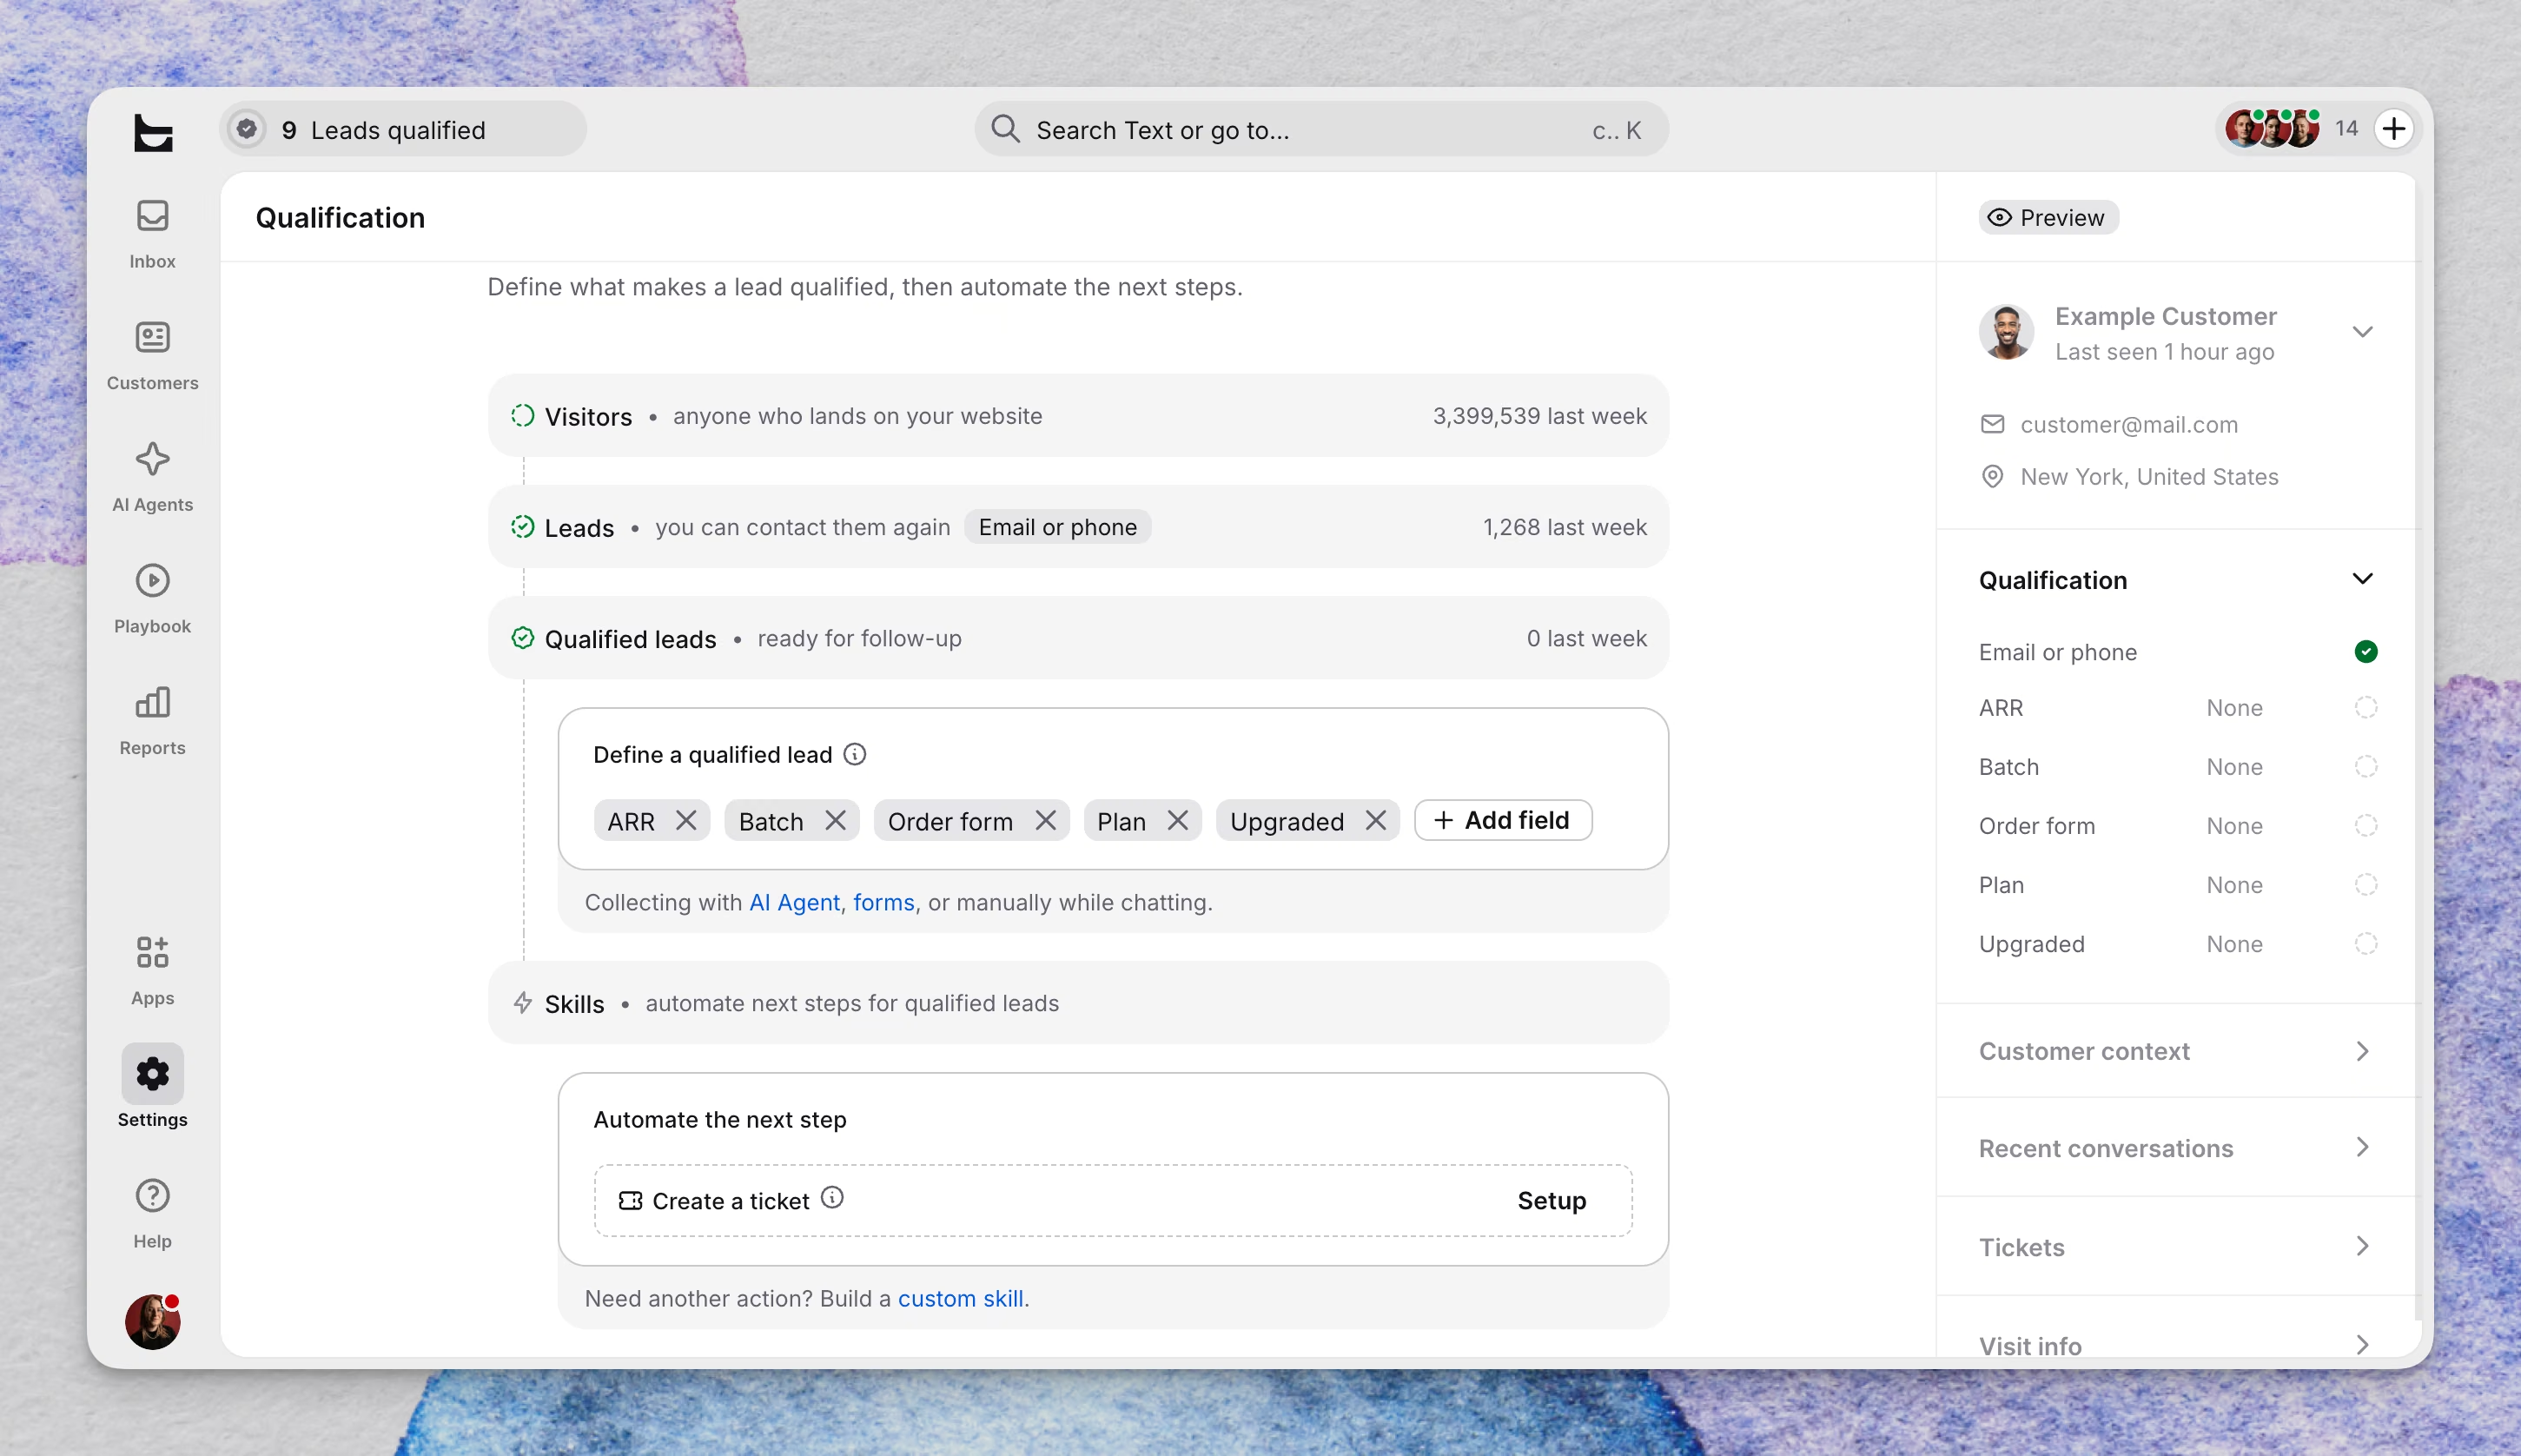
How do you define a qualified lead?
Open the Qualification page.
Pick the customer details a lead needs before it counts as qualified, for example, budget or company size.
Add a new field or edit an existing one directly on the page.
Check the preview. It shows how the fields look on the customer card your team sees in a chat.
These details are Qualification fields. Learn more about field types and categories in Customer fields.
How do you collect the details you need?
The Qualification page shows three ways to collect the required details and links to the AI Agent and to forms.
AI Agent: Create a skill that lets the AI Agent gather customer details during a chat. Answers update the details panel automatically. See how AI Agents work.
Forms: send a custom form during a chat. Answers save to the customer profile when you map the form fields to customer fields. See sending custom forms during a chat.
Your team: teammates add the details themselves while they chat with the customer.
How do you automate what happens next?
Set up a ready-made skill that creates a ticket for every new qualified lead.
On the Qualification page, find Create a ticket.
Select Setup. A ready-made skill opens.
Review the skill, then save it.
From then on, Text creates a ticket for each new qualified lead. Learn more about what tickets are and how they work.
Need a different action? Build a custom skill. See custom skills vs. custom voice to learn how skills work.
Good to know
Funnel numbers on the Qualification page cover the last week.
Qualification details stay on the customer profile across later chats, tickets, and visits.
Teammates see qualification details in the Qualification card of the details panel, which shows how complete the profile is.
Fields in the Additional context category are saved on the profile but don't affect whether a lead is qualified.
Qualification fields also appear as columns and filters on Contacts and Real-time customers.
Frequently asked questions
Where does my team see qualification details in a chat?
Teammates see them in the Qualification card in the details panel of a chat or customer profile. The card shows a completeness indicator, so your team can tell at a glance which details are still missing before they follow up with a lead.
Can I collect qualification details without the AI Agent?
Yes. The Qualification page lists three ways to collect the required details: the AI Agent, forms, and your team during chats. Use forms when you want a structured set of questions, or let teammates fill in details as the conversation goes on.
Can I automate something other than creating a ticket?
Yes. The ready-made skill covers ticket creation, and you can build a custom skill for any other action. A skill combines a trigger with a set of actions, such as tagging a chat or transferring it to a teammate.